PB&B Vegan Cupcakes

I am currently typing this at the airport terminal as a last-minute attempt to share something with you before I take off for two weeks. Three of us in the department are being sent to a week long statistics summer course at Penn State and the prep has been a scramble. It’s amazing just how many things you can get done before a trip that are not actually on your to-do list. I’ve been very productive and still haven’t managed to write a single word of the report that’s due  upon my return; funny how that happens.

I’m really looking forward to the trip though, and – as a bonus – I’m taking a detour home to Vermont for a week on the way back. It’ll be great to see family and friends again, not to mention my old food haunts and (of course) the climbing gym! 🙂 The hardest part of traveling will definitely be keeping to a strict work schedule the whole time, but once I get into the swing of things writing-wise I can usually churn things out pretty quickly. I just have to start the darn thing. So, enough chatting! Let’s get down to business…

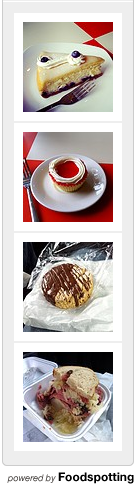
These cupcakes are another miraculous creation by the Post Punk Kitchen and are little servings of peanut-butter-banana heaven…okay, maybe not so little: I love to make my cupcakes in jumbo pans so you’re getting less of a “cupcake” and more of a “personal-sized cake” complete with a small mountain of frosting. However you choose to make this – mini to jumbo to full sized cake – you won’t be disappointed. We all know I’m a bit biased (see Jimmy Carter Smoothy and Buckeye Ice Cream), but even if you’re not a huge peanut butter fan I’m confident that you’ll love these and no one will ever be able to tell their vegan unless you let it slip!

PB&B Vegan Cupcakes

(very slightly adapted from Vegan Cupcakes Take Over the World!)

Ingredients:

For the Cupcakes…

½   C   overripe mashed banana

1¼   C   AP flour

¼   t   baking soda

1   t   baking powder

½   t   salt

¾   C   sugar

1/3   C   vegetable or canola oil

2/3   C   soy, almond, or rice milk*

1½   t   vanilla extract

½   t   almond extract

* Note: I’d recommend them in that order. The soy and almond milks have a creaminess the rice milk lacks and the soy milk will provide a more neutral base.

For the Frosting…

½   C   margarine (Earth Balance is awesome), softened

4   T   shortening

2/3   C   creamy peanut butter**

2   T   molasses

3   t   vanilla extract

1½ – 2   C   confectioner’s sugar, sifted

2 – 4   T   soy milk, more as needed

banana chips, vegan chocolate chips, chopped peanuts for garnish as desired

** Note: Use organic if possible (better flavor) and I love the brands that give you the “just peanuts” option (i.e. no salt , sugar, or added oil). If you’re using peanut butter with added salt, sugar, and/or oil, just omit the salt in the recipe entirely and reduce the amount of oil and sugar to taste.

Procedure:

1) Preheat oven to 350°F (325 if making jumbo) and prep pans with cupcake liners. Blend banana in a food processor or mash with a fork until completely smooth.

2) In a large bowl, sift the flour, baking soda, baking powder, salt and sugar together and mix well. In a separate bowl, whisk together the oil, soy milk, vanilla extract, almond extract, and mashed banana. Make a hollow in the dry ingredients and pour in the wet banana blend. Fold the wet mixture into the dry until just incorporated (don’t overmix! Small lumps are fine) and fill cupcake liners 2/3 of the way. Bake 20 – 25 minutes (35 – 40 for jumbo) or until golden brown and a toothpick inserted in the centers comes out clean. Completely cool before frosting.

3) In the last 10 minutes of the cupcakes cooling time, whip up the frosting: with an electric mixer, cream together the margarine and shortening until smooth. Add peanut butter, molasses, and vanilla and beat again until very smooth. Add the confectioner’s sugar and beat until incorporated – frosting will be very thick! – and taste, add more sugar if desired. Finally, dribble in soy milk while beating until frosting is pale, fluffy, and spreadable.

4) Frost the (completely cooled) cupcakes generously with PB frosting and top with banana chips, chopped peanuts, and/or banana chips as desired. Will maintain their shape without refrigeration (in reasonable temperatures) so these babies also travel well and will keep for 3 days.

Beezer’s Notes:

I’m really stuck now. I can’t decide which I love more: the Cookies ‘n Cream Vegan Cupcakes or these. Both are so good I could easily eat a whole batch alone, but both are two very different flavors… so I guess it’s a tie. These PB&B Cupcakes have a delicious banana-bread like base with a fluffy peanut butter frosting that manages to be packed with flavor without being cloying sweet. I also love the toppings which make the cupcakes fun to eat and add texture. These are definitely going on my favorites list and will be made as often as my workout schedule allows, haha.

Overall Enjoyment:  ♥   ♥   ♥   ♥   ♥

Vegan Cinnamon Swirl Bread

Well, it finally happened: I’m sick. I must say I’ve had a pretty good run: I avoided the flu that went around the office, the stomach bug that hit a few of my friends, and colds that seem to strike Brad every few weeks…but the most recent one he brought home finally nailed me. A pounding headache that’s strangely centered at the base of my skull has been clinging to me since yesterday. My neck continues to be sore despite Brad’s best messages (thanks for trying babe!) and my eyes water with the slightest glare or breeze. It’s a strange germ that’s assaulting my body these days that’s for sure, but I’m thankful it seems to be just a head-cold.

On Friday, when Brad was just beginning to get sick – and I was blissfully optimistic that I’d avoid this one too – I went to the store to get some goodies. Basket full of fruit, cheese, crackers, and…er…dark chocolate KitKats (they don’t sell them where I come from, ok?) I was on my way out when I spied an interesting sign by the bakery. The sign advertised cinnamon-swirled bread and, true enough, the loaves displayed had cute little swirls of dark brown cinnamon running through them. I was *this close* to buying one before I convinced myself that it couldn’t be all that hard to make at home (my Chocolate Babka attempt giving me courage) and I decided to give it a try.

A quick note: I adjusted this recipe to how I made it the 2nd time (just more paste) but the photos are all from the first attempt. Therefore, you should expect about double the coverage from your cinnamon-sugar paste than what you see in my photo. Also, if you aren’t concerned with dairy, substitute 2 T of melted butter for the oil in the cinnamon-sugar paste. The butter will make for a richer flavor – I used oil only because I wanted to share the bread with a friend of mine whose IBS doesn’t allow dairy products of any kind.

Vegan Cinnamon Swirl Bread

Ingredients:

4   Cups   unbleached white bread or AP flour, plus extra

1½   t   instant yeast

1   t   salt

1½   C   water, plus extra as needed

2 T + 1 t, separated,  neutral vegetable oil (like Canola) plus extra as needed

1   T   cinnamon

1   T   sugar

Procedure:

1) Combine the flour, yeast, and salt in a large bowl and whisk until well mixed. Add the water and 1 teaspoon oil and stir with your hand or a wooden spoon to made a slightly sticky dough. If the consistency is off add just a bit of flour or water – whichever is needed – at a time until you get a soft, easily kneedable, dough.

2) Turn out the dough base onto a generously floured surface to kneed until it is smooth and satiny (or, alternatively, use a stand mixer with dough-hook attachment). The dough should feel slightly springy and very soft to the touch. By hand this should take roughly 10 minutes of hearty kneeding or 5 by stand mixer.

3) Shape the dough into a ball and place into a clean, dry, and floured (or oiled if you prefer) bowl. Cover the bowl with plastic wrap or a garbage bag and let rise in the warmest area of your home until doubled in size. Depending on the temperature of the dough expect to wait around 45 min – 1 hour or longer. In the dead of winter at my old, leaky apartment I would have to wait nearly 4 hours – hurray for a modern building!

4) Once dough has risen, tip it out onto a floured surface and gently kneed a few times to pop any bubbles and redistribute the yeast. Reform into a ball and repeat step 3 up to 4 times for added flavor and texture. Once you’re satisfied with the rising process, gently roll out the dough onto your floured surface until it is about as large as a sheet of paper (8.5 x 11″) and 1″ thick. In a small bowl mix together the cinnamon, sugar, and 2 Tablespoons oil to form a thick but spreadable paste – add more oil if needed but be careful: you don’t want soggy bread! – and spread the paste over the dough using a pastry brush or spoon as evenly as possible. Beginning at one side, gently roll up the dough width-wise as tightly as you can without deforming it. Once fully rolled, carefully transfer the dough to a bread pan, cover with a clean dish cloth, and let it proof until it has doubled in size once more – about another 30 minutes. As the bread is proofing, preheat your oven to 500°F or its highest setting.

5) When the bread is ready for the oven (it should spring back into shape if gently poked and be roughly double in size), brush the surface with a bit of water – or, even better, use a spray bottle if you have one – and bake for 10 minutes. After 10 minutes adjust the oven temperature depending on the following: if the crust still looks very pale, turn the heat down to 400°F. If the crust is browning: 350°F. If the crust is browning quickly: 325°F. Bake until the crust is golden brown and the loaf sounds hollow when you tap on the bottom of the pan – 40 to 50 minutes.

6) Let the bread cool completely before removing from the pan and slicing. I know, I know, it’s hard to wait – especially with the wonderful smell! – but trust me, you’ll be glad that you did.

Beezer’s Notes:

Well, aside from my guy teasing me that my swirl didn’t come out symmetric (and he thinks I’m the perfectionist?), I am very pleased with my spontaneous bread experiment. The first loaf turned out to be quite pretty…but really didn’t taste like anything other than fresh white bread – very nice, but not the strong cinnamon-sugar swirl I was going for. The second attempt – with a full Tablespoon of both the spice and the sugar – gave me what I wanted: soft, fluffy white bread with a sweet cinnamon swirl throughout. Excellent toasted with a bit of butter or even to spice up my all-time fav: PB&B. New recipe + money saved? Win, win.

Overall Enjoyment: ♥   ♥   ♥   ♥

Homemade Bagels!

Yes, this post title deserves an exclamation mark after it. Why? Because during my year in Japan the food I ended up missing most surprised me: it wasn’t one of the foods I ate on a regular basis like non-fat yogurt, seriously sharp cheddar, or multigrain bread…it was bagels! Bagels with cream cheese or PB&B or just a generous slathering of butter. Yes, my friends, I craved the usually oversized, chewy-on-the-outside, soft-on-the-inside: BAGELS!

Well, I’ve been back on this side of the planet for about 3 years now and have been able to satisfy any cravings that pop up unexpectedly…until now. I’m sure there has to be a homemade bagel shop somewhere in either Halifax or neighboring Dartmouth, but without a car or significant free time I’ve been stuck with these. I was gamely making do until a friend of mine from Colombia mentioned that the only bagels he’s ever tried are the pre-packaged ones from the grocery store (*gasp*). I decided that, for both our sakes, I was going to try the homemade bagel recipe so clearly laid out for me in my go-to bread book: The River Cottage Bread Handbook by Daniel Stevens.


Homemade Bagels! (adapted very little from The River Cottage Bread Handbook)

makes 1 dozen little bagels

Ingredients:

1  lb.  2  oz.  unbleached, white bread flour

1½   t   instant yeast

2   t   fine salt

1   C   +  1  T   warm water

1½   T   superfine sugar

3½   T   vegetable oil, plus extra as needed

1   medium, free-range egg – beaten*

poppy or sesame seeds for topping (optional)

* Note: For my vegan friends out there, just skip the egg-wash and use water or a light brush of oil to adhere seeds.

Procedure:

1) In a small bowl, sprinkle yeast onto the warm water and let sit while assembling the rest of the ingredients. In a large bowl, whisk together flour, salt, and sugar (since I didn’t have superfine sugar, I dissolved mine in the water). Pour the wet ingredients into the large bowl with the dry and begin to incorporate the two with a wooden spoon. Once the dough has begun to cling together, turn it out onto a clean surface dusted with flour and kneed until smooth and elastic (about 10 minutes) – or, alternatively, use a standing mixer with dough-hook attachment for about 5 minutes on medium speed.

2) When dough has become smooth and elastic, shape into a round and coat it with a bit of oil. Place in a clean dry bowl, cover with plastic wrap or a bag, and let sit in a warm place to rise.

3) When dough has approximately doubled in size (anywhere from 1 – 3 hrs depending on the temp. of the room – I let mine sit overnight), deflate it, kneed it a bit to redistribute the yeast, and divide into 12 even pieces. One at a time, roll the pieces into a sausage-shape about 6″ long. Wet the ends and press them together to seal piece into a ring shape. Assemble all 12 pieces and place on a lightly-oiled baking sheet. Cover rings with clean clothes and let proof <– have a cold room and/or want to speed up this step? I began preheating my oven here and set the covered baking sheets on top (NOT in!). The heat from the oven warmed the dough and the rings doubled in size within an hour.

4) Preheat the oven to 400°F. Bring a wide pot filled with about 4″ of water to boil. As water is heating, place proofed rings on a tray (I used a bowl but some got squished) off to the side and re-oil your baking sheet off to the other. In addition, get a clean dry towel ready to drain the wet bagels on. When water is at a rolling boiling, turn it down to a simmer and begin poaching your bagels in small batches – they will puff up a bit in the water! – by cooking a batch for 1 minute on each side before putting them gently onto the dry towel.

5) When all the bagels have been poached and drained, gently place them onto the prepped baking sheets. If any have come apart just carefully stick them back together again. Brush bagels with beaten egg and sprinkle with any toppings you’d like. Bake for 15 minutes or until the bagels are a uniform, glossy, golden brown. Let cool on a wire rack for at least 10 minutes or until just slightly warm before slicing (otherwise they’ll seem gooey).

Beezer’s Notes:

Folks, Daniel Stevens knows what he’s talking about. These little guys had the perfect texture and the most lovely color, and you know what? They really aren’t difficult to make, you just add in the poaching step. My dough was a bit dry, I’ll admit, but I think that was due to letting it rise overnight. If you’re going to do the same you might want to rub in an extra teaspoon of oil beforehand.

My friend from Colombia said he really liked them although, since he’s never had any homemade bagels before mine, we admit he’s a bit biased, haha. Finally, if you’re like me and really love a good bagel, you might want to consider doubling the batch and either making 2 dozen small ones or one dozen jumbo. I rather like the palm-sized versions so I’m going to make 2-dozen next time and begin trying more exotic flavors (cinnamon raisin, cinnamon sugar, blueberry…).

Overall Enjoyment:  ♥   ♥   ♥   ♥   ♥